More info on the project
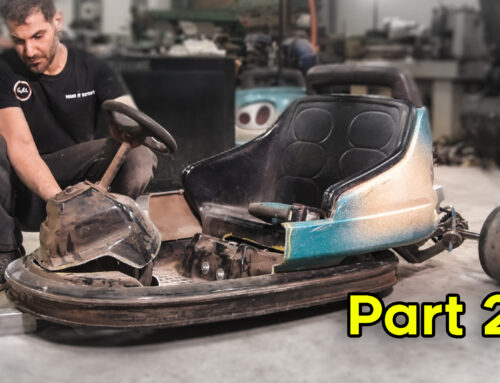
On this episode, after finishing with the most mechanological pieces of the bumper drift car, we are occupied with its body and its final touches before its final driving.
We have cut and shrinkened the original body of the bumper car to fit us in and we filled up the gaps with play wood. Then, we covered the playwood and we reconnected the body with fiberglass. On the body we created two airfoils responsible for keeping the motor cool making the mold using polysterine lined with adhesive tape and this is a simple and very easy method.
In order to always find our vehicle in a drift mode, we put plastic sleeves that we have cut from a pvc waste pipe. Then, we modified the chair to be able to be put and applied well on the chassis. After, we made the last piece of exhaust. Also, using an old stainless steel fire extinguisher we made the fuel container of the vehicle having 4litres capacity.
After we had rubbed the vehicle we painted the whole of it in mat black colour with some orange touches which are the trademark of the make it extreme vehicles. For the painting we used paints that can be applied directly on every surface to save as much time as possible. Another thing that we added even if we do not present its making on the video is the appliance of the brakes on the front wheel for a better and safer driving.

Finally, after fixing the body on the chassis we proceeded to regulate the motor before the final driving. Then, after repairing the inner tube of our bumper car, we reinstalled it and inflated it. Our vehicle is ready to be driven so there is more fun at the final part.